So you are interested on building yourself a GrandPrix Track, congratulations. I have done much research to find the closest thing there is to a standard for tracks of this type. I found that most designs use an angle of 30 degrees for the start ramp and approximately 48 inches from the ground to the start gate.

After reading through the plans you will find a cut sheet on the last page. Full instruction are at the beginning of the track plans, this web page is to be treated as an overview with pictures of the sections I am referring to. Track-Plans can be downloaded here.
Cut and sort the pieces into piles and set up for assembly. Start by measuring and drilling out all the joint plates, mark the center line across the plate to mark where the end of the track section will be when assembled, also mark the center the other way with a small mark to aid in lining it up with the track base.
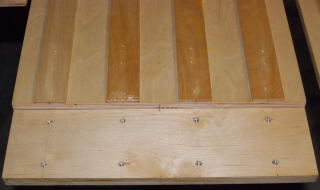
 Attach joint plates to the base with glue and screws, making sure the screws will fall under the lane strips you will be attaching next. Mark centers on each strip and the centers on the base, put glue on the bottom of the strips and align carefully and fasten, avoiding the areas you will need to drill for the joining bolts. This step is easier with two people but can be done by one if you do not rush. After the sections are complete line up the sections one pair at a time clamp and drill the bolt holes from the bottom through the joint plates and up through the track, careful not to push too hard so the wood does not splinter.
  This can also be accomplished by making a master plate to use to locate all holes.
Once completed use a forstner bit to drill out the strips to make room for the bolt heads and washers. Be sure to go all the way through the strips to the base, you will need the full 1/4 inch depth to get enough clearance for the bolt heads and washers.
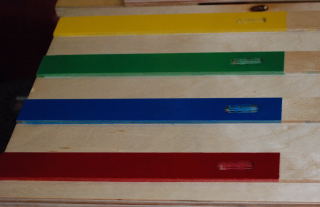
Slot detail: 1/2” x 1 1/2”
First drill a hole to accommodate the router bit. The router bit should be narrower than the final width of the slot. If you are not confident routing the slots free hand it is best to make a jig to control the length and width of the slot. The jig can be slid over for each individual slot. When cutting a slot do not try to cut the entire depth at one time, it will take several depth changes to cut the slots, or drill out the center of the slots and router the edges for a clean finish.
 Before routing make sure that lane strips are in place. The slots go through the lane strips and the base of the track. Route both layers at the same time in order to get even slots.
When constructing the finish section, lay the short pieces on the base first and run the top lane strip over to create a smooth transition. Tapering the strips thickness also helps, but is not necessary to accomplish this task. If tapering, a belt sander makes this very easy.
I am still trying different materials for the stop section to slow the cars down quicker. I have used Gaffers tape before and strips of pond liner rubber even the rubbery sheets you line the bottom of you tool chest drawers with, and now thin neoprene with the exposed rubber side (like the bottom of a mouse pad) it works well. It can be found in the form of door mats at your local Lowe’s. I picked up some holiday mats after Christmas at a great deal.
